Monday, August 30, 2010

Simplicity 4068 – Finished

The pants are finished. I made several attempts at getting a photo that showed the detail without all of the wrinkles. This fabric made fun of my efforts and I finally gave up. Don’t worry. They won’t be worn with a tucked-in shirt. I promise.
Where did the extended waistband tab go? Well, to be honest, it irritated me. And, since it did not serve a vital function, it no longer exists.

For almost a year now, I have been sewing whatever I have felt like sewing. Knowing that the bulk of my wardrobe consists of knit tops combined with simple pants, that is where my muslins have focused. Lately, though, I have been thinking that it is time to get serious and create a plan that will fill my closet with interesting, well-fitting clothes.

I will continue to try out different patterns using the odd pieces of fabric that I have here. These fabrics were specifically purchased to practice on and I have considered it a bonus when I wear something made from them. Even after a year, there are still several pieces left. I am interpreting that to mean that there is still more practicing to be done. I will feel better about buying more fabric once the stacks have gone down.
I want to try a few other pants patterns before I begin putting the Frankenpattern pants pattern together. This Silhouettes pattern, #3600, Ralph’s Pant, has been waiting in the file. It has the requisite front pockets, a fly opening, and a contoured waistband. To make it a fair comparison, there is one more piece of this stretch polyester suiting. This time the color is wine.
As part of getting serious about my wardrobe, I purchased a coverstitch machine. The Ottobre raglan t-shirt with the ugly hems convinced me. That, and a special at Ken’s Sewing and Vacuum Center. It came with all of the attachments, no tax, and free shipping.

I’ll let you know how it works.

Thursday, August 26, 2010

Simplicity 4068 – Almost Finished

Close, but not quite there. I was getting tired and knew that it would be best to stop. The lower edge of the waistband facing needs to be sewn down and then a button and its buttonhole added.

As expected, I needed to remove two inches from the hem length. It looks like that is becoming a standard adjustment for me. The pants fit but I will wait and make a better assessment once that facing is secure. I like the look of the curved waistband and sewing it on in two pieces just makes a lot of sense. It also provides another opportunity for fitting my apple-shaped middle.  I did end up using that built-in extra at the center back waist. Good thing it was there!

The waistband and the front pockets are the best things about this pattern. However, I don’t like these pants from the upper thighs downward.  The legs are close-fitting.  I am used to a pant with a fuller thigh that tapers to a classic, straight leg. My TNT pants pattern, McCall’s 5537, offers that full, yet not baggy, thigh. But, I like the curved waistband of this pattern much better than the McCall’s pattern. Frankenpattern? Yes. You see it coming, too.

Monday, August 23, 2010

Simplicity 4068 – Progress

Over the past few days, bit by bit, I have been putting the pants muslin together. I keep getting sidetracked. First, while selecting a button to sew onto the waistband, I felt the need to organize, by color, my buttons and then it mushroomed from there. This getting organized thing is good for me, but it didn’t get the pants sewn. The waistband facing still needs to be attached and the center back and inner leg seams joined. Other than the waist fasteners and the hems, I should be done soon.

I pinned the pants (very briefly, as I didn’t want the fabric to stretch too much before the pieces were connected) to the dress form and everything looked good. The side seams were in the right place. There is too much room in the center back seam but that is fine, as the pattern has extra added there for fitting.
So far, I like this pattern. Sewing the waistband on in two pieces made it painless to ease the pieces together. I sewed ¼” twill tape into the pocket facing seams and into the lower waistband. I’ll put some into the top of the waistband, too. That should keep these areas from stretching out. I added extra fabric for the fly and so skipped the separate fly piece. I ignored the fly underlap on this pair as well as the back pocket flaps and the belt loops. As usual, I will be cutting off a few inches from the hemline.

My goal is to have a simple pants pattern with a fly zipper and front pockets. Besides a reasonable fit and comfort, my only other requirement is that the pockets be deep enough to hold my keys, without falling out, while I am loading my vehicle at Costco. I can do this.

Wednesday, August 18, 2010

Ottobre Woman 5/2008 No. 8 – Raglan-Sleeve T-Shirt - Muslin

I have two spools of thread that match the olive pants fabric perfectly. However, my closest match for serger thread is black. Of course, serger thread won’t show and therefore it isn’t terribly important, but I really was expecting the thread box to produce a closer color match. The fabric store failed, too. No olive colored serger thread there, either. I’ll try another store tomorrow but I’m feeling like it is going to be black serger thread for the pants.
So, in the meantime, a slight detour. On her last visit, my all-things-sewing enabler, DD#2, had convinced me to order another Ottobre Woman back issue (Autumn/Winter 5/2008). This particular issue was approved as it contains a pencil skirt pattern that she especially likes and there is a coat pattern for me. I’ll help her to sew the skirt the next time she is here.
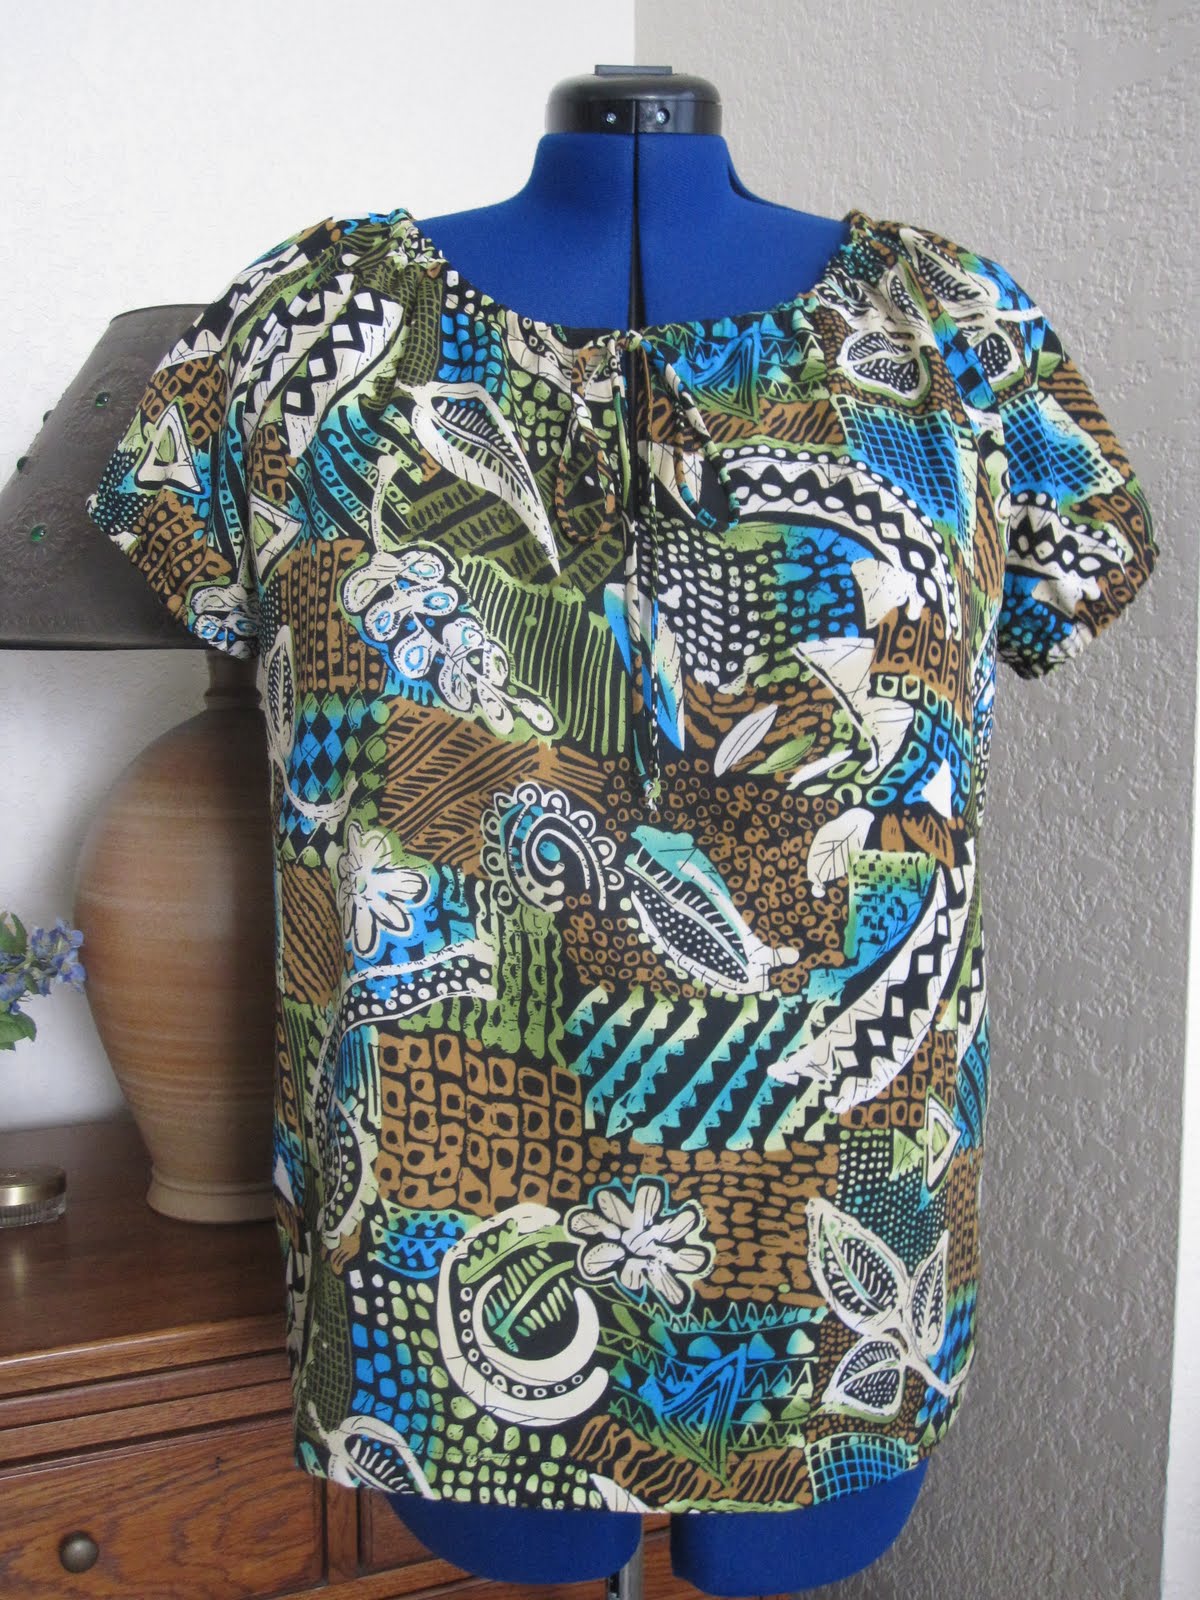
After the success of the Ottobre inebriated targets t-shirt muslin, I wanted to try the raglan-sleeve t-shirt from this 5/2008 issue. Once again, I traced a size 50. The only change I made was to shorten the sleeves to ¾ length. The fabric came from Fabric.com earlier in the year. Surprisingly, when I looked at my order confirmation, this was not my normal $1.95/yard fabric. I had paid a whopping $4.98/yard for this nylon/lycra rib knit.
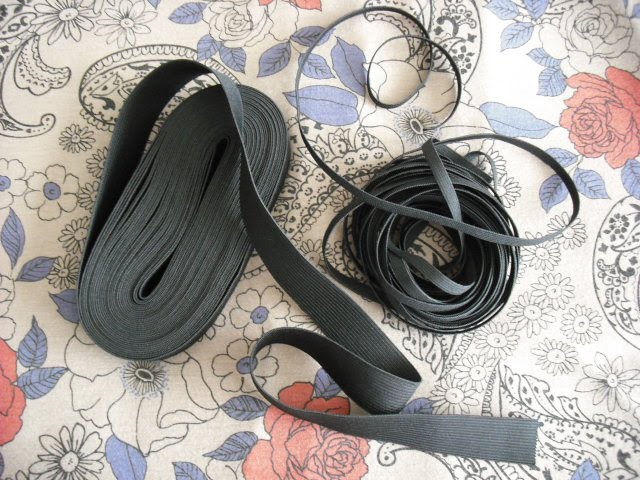
This fabric is heavy and very stretchy. So stretchy that I sewed clear elastic into the sleeve/shoulder seams and also into the neckband seam. I used the Bernina embroidery foot, #030, to apply the elastic. I love that little presser foot! While sewing the elastic on, I only had to be concerned with keeping my eye on the seam allowance width. The foot took care of the elastic.

The serger gave me a bit of trouble when serging with the clear elastic on top. It just didn’t want to go. I turned the fabric over so that the elastic was on the bottom and that made the difference. No complaints and no broken needles.

Normally, I would somehow topstitch on or next to a t-shirt neckband. This fabric is not only thick, there is also the addition of that clear elastic. I opted to hand-tack the sleeve seams to the neckband seam. Everything is the way is should be – flat.

I didn’t put any clear elastic into the side seams or the hems. And, before sewing the hems I had experimented on some scraps. Topstitching was a mess, so I tried the blind hemstitch instead. I had to test several combinations of stitch widths and lengths to come up with one that wouldn’t break the thread when the fabric was stretched a bit. The stitches show on the outside, and they look awful, but the hem is strong and it looks better than the stretched-out topstitching.
I am storing my traced patterns from Ottobre, Burda, etc. in one gallon zip storage bags. Along with the pattern, I also include a copy of the instructions for that item. When the garment is complete, I file the bag with my other patterns. So far, that is working. How do you store your traced patterns?

Sunday, August 15, 2010

Simplicity 4068, View C – Muslin

When I was rummaging through my patterns looking for something to make from the scraps of the Sommermode muslin, I came across this Simplicity pants pattern. It had been traced, but I don’t remember when nor do I know why it ended up back in the file without being sewn.

Upon first glance, it is very similar to my TNT pants pattern, McCall’s 5537, a "Palmer/Pletsch Classic Fit" pattern (see below). The only difference is the Simplicity pattern has a curved waistband whereas the McCall’s waistband is straight. No matter. With a copyright date of 2006, it is now sufficiently aged to finally construct the muslin and see if it works.
Pants - McCall's 5537

I chose an olive colored stretch polyester suiting for the muslin. The fabric came from Fabric.com back in October, 2009. I had previously made pants from McCall’s 5537 using this same fabric in pewter.  The fabric is wonderful so I hope this test pair fits.
Before I cut the pants muslin, I made myself another top from New Look 6179. The lightweight polyester fabric came from JoAnn's. I raised the front neck edge ½” and tapered to 1" for the rest of the neck edge. Adding a bit of neck/shoulder coverage eliminates bra strap exposure. I also added 1” to the sleeve hem which is just enough to make the sleeve more comfortable.
My sewing things are still being juggled around to incorporate the maybe/maybe not Horn cabinet. Besides installing the Singer 403A, the cabinet drawers have been filled with various tools and notions. It feels as if it has always been here and that makes me smile.

Monday, August 9, 2010

Ottobre 2/2007 No. 2 - 3/4 Sleeved T-Shirt - Muslin

I keep reading blogs mentioning Ottobre Woman patterns. There isn’t a local source (that I am aware of) for this pattern magazine. However, curiosity finally bit hard enough that I sought out a back issue via the web.
I chose the 2/2007 issue as an introduction because it contains several t-shirt variations. And, really, can one have too many t-shirt patterns? Afterall, there is the ongoing quest for the perfect t-shirt. Well, ongoing in my world......Also, this issue has had much adulation on Sewingland blogs.

This is No. 2, a ¾ sleeved t-shirt. I traced size 50 with no changes. The neckband was sewn a bit differently from the instructions. I sewed the strip into a ring, folded it in half and attached it to the shirt, placing the seam at the center back. To clean it up, the seam was serged and then topstitched with a stretch stitch. As this was a muslin, the sleeve vents were skipped.
Other than this bright, inebriated targets ITY fabric (from Fabric.com) I am pleased with the result. Well, I am not overjoyed about the topstitching. I selected one of the stretch stitches and made the best of it. Will there be a coverstitch machine in my future? I sure hope so.
The other garments in this issue look like they would be comfortable, too.

Do I dare wear this fabric in public?

Saturday, August 7, 2010

Sommermode Modell 5 – Muslin II

What a difference one size makes! The problems I had with size 46/48 simply disappeared when I made the 42/44. Once I re-traced the pattern, it went together quickly. I did use the side seams of the 46/48 and I added an inch to the hem. The only other modification I made was to create a back neckband. The back neck edge was to be finished with a fabric strip. I couldn’t figure out how that was going to look smart, so I did away with it. I like this pattern and next time I will change the sleeves to 3/4 length.
The fabric is a Lycra knit called “Dryflex." It was a $1.95/yard clearance offering from Fabric.com and purchased several months ago. Though I am not nuts about the color, the fabric quality really is nice. I have a few yards left so you will be seeing it again.
Now, when I go to make a muslin, I tend to choose the size based on the measurement chart included with the pattern. Lately, more often than not, that chosen size is too big and I am not sure why. However, I do know that there are many variables involved in the sizing of a sewn garment. Among them:

• The ease the designer included in the garment
• The ease that I expect the completed garment to have
• The type of fabric chosen

I detest tight fitting clothing and that is why, if I am between measurements, I will pick the larger size. Maybe it is time to reconsider this process.

Anyway, a small triumph and another TNT (tried and true) pattern for the file. Yeah!

Wednesday, August 4, 2010

Stretch & Sew 2046 – Or, What To Do With Leftovers Of Leftovers

I am taking a brief (heh, heh, brief - get it?) break from the Sommermode t-shirt and decided that a small project utilizing the scraps of the muslin (which came from the scraps of the Butterick Clash top) would make sense.

In flipping through my patterns, I found Stretch & Sew 2046. I’ve had this pattern since the early 80’s and just never got around to trying it.

There was barely enough fabric for the pattern pieces. Based upon my measurements, I cut a size 10 (37” waist, 46” hip) of the hipster (the style on the left) and sewed the pieces together, using 1” knit elastic for the waist and ¼” knit elastic for the legs. I chose knit elastic instead of lingerie elastic simply because it was already here. Ignoring the elastic lengths given on the pattern, I determined what I wanted them to be by placing the elastic around the appropriate places and added for seam allowances.
The result wasn’t bad for a first attempt, but not wearable and certainly not photo worthy. I had created granny panties! The fabric isn’t that stretchy, so it wasn’t due to a fabric and pattern mismatch.

Next, I cut a size 9 (34 ½” waist, 44” hip) out of some similar leftover fabric and tried again. This time it worked, but still not wearable. The elastic is too loose on the back leg. I think while attaching the elastic to the back, some additional elastic stretching has to occur. Dividing the fabric and elastic into quarters and then matching them up does not put enough stretch into the back leg. The ratio is off.
Another issue is the cut of the front leg. The pattern for the next pair will be updated with a higher front leg thanks to a French curve and a Sharpie.

The pattern instructions are written well, but you could skip them as the illustrations clearly show the construction steps.

Now, just because they came from fabric that normally would be discarded, these hipsters are not free. The elastic has to come from somewhere. However, after a few more attempts, I might actually end up with something that fits better than what I currently wear. And that, dear friends, is very appealing.

Monday, August 2, 2010

Sommermode Modell 5 - Muslin

Here is the Sommermode t-shirt muslin. Because it is a muslin, I went ahead and sewed those questionable bust darts – just so I would know what I was dealing with. I chortled and blubbered when I tried it on. The darts were not at my bust, but mid-way between my bust and my waist. Not my best look and obviously the first thing to fix. I removed the darts and replaced them with gathers at the side seams.
The easiest revamp would be to raise the darts, but then I still have t-shirt darts. I don't want t-shirt darts. To make them go away they have to be moved.  As I don’t want the shoulders, armholes or center front messed with, my remaining options are limited to the gathered neckband area and the hemline.
I made a few copies of the 1/4 scale front bodice sloper template and experimented. The template is from Pattern Making by the Flat Pattern Method. Norma R. Hollen wrote it and I have had it since the late 70’s.
The width of the front is increased if the bust darts are moved to the hemline (left). However, moving them to the existing gathers at the center front neckband would not add fullness to the body of the shirt (right). I'm thinking that my best bet is to move the darts to the center front neckband – after raising them first.

The shoulders are a bit wide (though not bad), the armscye is too low and I don’t have full motion of my arms while wearing the muslin. Should I try the next size down? Doing so would solve the dart problem, as the other sizes of this pattern do not include a bust dart. In addition, maybe the armscye would fit me better. Of course, I would need the extra girth provided by size 46/48 to accommodate my ample mid-section.

This style is similar to the Clash t-shirts. Yet, it could serve as another basic for me to wear with jeans or dress pants. For that reason, I will produce another muslin. Yep. Using up those stored fabrics. Bye, bye fabrics. Bye, bye.