Showing posts with label Skirts. Show all posts

Tuesday, July 2, 2013

Style Arc's Gorgeous Gore Skirt


I was looking through my basket of “want-to-sew-soon” patterns on Sunday and came across Style Arc’s Gorgeous Gore Skirt pattern. I’ve been wanting to sew a simple summer skirt and this one fit the bill: no zipper or sewn-on waistband.

Style Arc Gorgeous Gore Skirt

Less than two hours later, I had my new skirt and I absolutely love it! The animal print ITY came in a Fabric Mart bundle. I hadn’t considered it for a skirt, but the fabric is perfect for this pattern.

There are only two pattern pieces, the upper yoke (front and back use the same piece) and the gores (six – again, all the same). I used ½” elastic for the waist instead of the 1/4” specified. Why? Because that is what I had in the drawer and it worked just fine.

Other changes? I under-stitched the yoke facing, using the coverstitch, instead of top-stitching through both layers at the skirt top. Also, the coverstitch was used for the row of stitching beneath the elastic. The waist has to be able to stretch to get over the hips. No way straight stitching won't pop.

I wore my new skirt to the office on Monday and I felt dressed up, yet so comfortable! I think I’m on to something here…

Monday, May 2, 2011

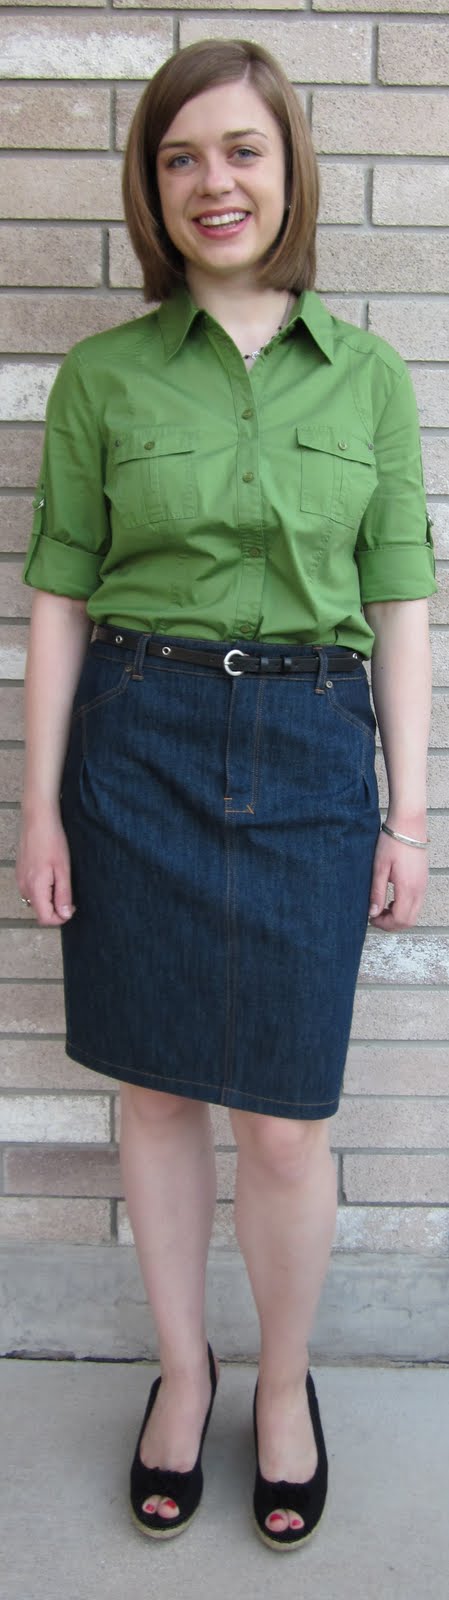
Denim Snowflake Skirt – Burda Style 12-2009-122/123


DD#1 was gracious and allowed me to take a few photos of her wearing her new skirt. I blended Burda Style 12-2009-122 and 123, sewing single-welt pockets onto the back. The front pockets came from OOP Simplicity 7581. To keep the hem hanging nicely, I serged the edge and turned it up only once and topstitched.

Thursday, April 28, 2011

Shorts - Burda Style 03-2011-131B (Kinda)


I really like the Burda Style shorts I had made about amonth ago. I wear them every chance I get and have realized I should have another pair. I started with a blank canvas, using Burda Style 03-2011-131B, for the new ones.

Burda Style 03-2011-131B

It took three evenings, from tracing the pattern to pressing the last rivet in place, to complete them. I didn’t have a game plan, other than knowing I wanted to end up with wearable shorts. I made whatever changes I wanted and topstitched however/wherever I wished. I was amused and entertained. Still, it took three evenings.


Changes to the pattern:
  • Incorporated front pockets (from OOP Simplicity 7581)
  • Coverted back darts to a yoke (this pattern has fairly long back waist darts; I didn’t revise the length but simply placed the yoke seam at the end point of the darts - yeah, call it lazy...)
  • Added back patch pockets, belt loops and rivets to complete the jeans styling 
I enjoyed taking the basic pattern and modifying it. For instance, the back pocket topstitching was selected because I wanted an excuse to play with the Bernina bartack/buttonhole stitch. Like the front pockets, the pattern for the back pockets also came from Simplicity 7581. I eliminated the bottom point by folding it up to create a horizontal edge.
The fabric for the pocket lining is a 100% cotton Timeless Treasures offering named April in Paris. It came from Fabric.com.

Sewing the same type of fabric repeatedly (this is project #9 from the roll) has its advantages, namely a chance to deal with some of my sewing issues. I’m finally figuring out the best way to bartack belt loops (ordinary clear tape, away from the stitching path, holds them in place until they can be stitched down) and exactly where to place the bottom of the zipper so there is enough room to topstitch the fly. And, I’m comfortable experimenting with welt pockets knowing there is plenty of matching fabric available if I make a fatal error.

The rivet press has worked perfectly. I think I’ll be making most of my jeans from now on and this a wonderful tool to have.


So far, each garment from the roll has been different and I think that will continue. The most distinctive garment has to be the Snowflake skirt. I hope to get some other photos soon.


Last week, I needed a new top to wear to a casual Easter brunch. There was just enough of this silk and cotton stretch twill leftover from a blouse I had made a year ago. The pattern is Stretch & Sew 1582 which is the same pattern that I had used for my purple Austin top.

Truly, it took longer adjusting the tension on the Bernina than it did to sew it up. Nothing fancy, but it was quick and I had something new to wear.

Next up? More welt pockets.

Tuesday, April 12, 2011

Tammy and the Single-Welt Pocket


This is the newest project to come from our roll of denim. Behold the beauty of my first welt pocket.


Burda Style 05-2010-130

Besides modifying the number of welt pockets, there were other changes made from the original pattern. The most obvious being the zipper fly; it opens on the other side. I topstitched wherever I felt like it. Nope, not gonna have have to worry about dry rot in that cone of topstitching thread…The extended waistband tab was eliminated. Though it is a nice design feature, I felt it would add too much bulk, especially when constructed from denim and a belt added.


Everything was sewn on the machine – no handwork at all. I like that! I got to use the rivet press again and attached rivets to the front pockets.

Out of all of the welt pocket resources I found (and there isn’t a shortage out there - just look), I chose the information from my Palmer/Pletsch Pants for Real People book. At first, it was because the instructions have the inside pocket pieces long enough to be sewn into the waist seam and the dimensions for the various pieces were provided. That meant I didn’t have to do any math and could concentrate on the technique. However, it was the step-by-step “holdin’ my hand all the way” method got my attention.


With a total of two welt pockets to my name (the practice one and the real one), I’ve learned that making a welt pocket isn’t difficult, but it is time consuming. I just followed the instructions and it worked! The illustrations make it clear what needs to be done and the text is easy to interpret. I was lucky and found my copy at a thrift store. I think I paid a dollar for it. However, even at full retail, it is worth having as it contains a wealth of practical information.

Practice Single-Welt Pocket

Besides thrift stores, I have also purchased used sewing books online. For instance, the Vogue Sewing book (pictured in my last post) came from Amazon.com for $.01; shipping was $3.99. I’ve had only one bad online experience - a much wanted sewing book arrived smelling like cat urine. It was promptly returned.

Working on this skirt, I've not only learned how to sew a single-welt pocket but I also credit it for improving my future bar tacking skills.

I had a "duh" moment while stitching the buttonhole onto waistband. For as long as I've had the Bernina, I have been using a narrow zigzag stitch to secure fly shields, attach belt loops, etc. and I have been less than thrilled with the results. My bar tacks look messy, even with careful marking and stitching. Why couldn’t I just use the same stitch that the Bernina uses for buttonholes? After all, it is a clean, tight zigzag; just what I need for a bar tack. I couldn't come up with a good reason not to use it, other than the Bernina Buttonhole Police might come after me…


I don’t know what you have to do to get ready to sew a buttonhole on your machine, but on mine, you attach the buttonhole presser foot, put the bobbin thread through the finger of the bobbin case, adjust the stitch length and switch the buttonhole knob to position 1. This makes a great stitch for bar tacking. I wish I had thought of this sooner. Anyway, my bar tacks should start looking better.

Burda Style 12-2009-123

Burda Style 12-2009-116

What’s coming next from the denim roll? DD#1 has asked for a version of the Burda Style 12-2009-123 flounced “Snowflake” skirt. The denim has been cut and I will start on it today. I have also sewn some cropped denim pants, using modified Burda Style 12-2009-115/116, for myself.

Those Burda's are finally earning their keep.

Saturday, April 9, 2011

To Welt or Not?


The front of my latest project, another denim skirt for DD#1 (Burda Style 05-2010-130), has been waiting to be joined to the back. It has been taking up space on the worktable as I had not been able to make up my mind regarding the back pockets.

Burda Style 05-2010-130


Up until now, I have avoided sewing welts of any type. To me, welts seem delicate. You know - cutting into the very corner with a thread or two left for a seam allowance. I've thought they should be reserved for wool jackets and other garments that aren’t sent on frequent trips through the washer and dryer. Yet, that thinking must be irrational; I’ve gained some insight in my back pocket studies (yes, while in the checkout line at Costco and HEB). Welt pockets are used extensively on washable pants. I no longer can use fragility as my excuse. 


I pulled some sewing books from the file and have been reading up on single welt pocket construction. I have also found several online tutorials that deal with welts.
 

Ok, this pencil skirt will become my welt pocket experiment. To aliveate anxiety, I am limiting the experiment to one pocket as creating a matched pair could be beyond my current skill set. Oh, don’t worry - I am a woman equipped with fusible interfacing and Fray Check...besides, I’ll try it out on some scraps first.

DD#1’s Bird Skirt – Vogue 2811

Sunday, March 20, 2011

Denim Skirt – Vogue 2811 (Seriously Modified)

DD#2 came home for a visit. Before, we had talked about sewing her a new denim skirt while she was here.  And, as readers of this blog know, we currently have plenty of denim so I felt that I could make that happen.

This was to be an abbreviated visit. I planned ahead and cut the skirt out before she arrived. For the pattern, I chose Vogue 2811, view B (OOP).  View A has non-working pockets (why would you bother?) and to me it looked too short to be practical. View B was about the right length but it needed front pockets and a yoke added to the back skirt piece.
Before starting on her skirt, I showed her my unfinished Burda shorts and Capris. On the Capris, I’d embroidered the bird from the Ottobre Woman 02-2007-14 stretch Capris pattern. She wanted that bird on her new skirt. What is a mama to do?
It was easy to create the back yoke. I used a French curve to draw the yoke, making sure the line intersected the bottom point of the waist dart, then cut the yoke and skirt pieces apart. I closed the dart on the yoke and added seam allowance to the bottom of the yoke. I also added seam allowance to the top of the skirt piece.

The front pockets were borrowed from DD#1’s Burda 6006 Anita jeans. The back pockets also came from the Anita jeans – but from the pocket pattern I had drawn for the Anita jeans. I simply guessed for the pocket placement. She wasn’t crazy about how high the waist was, so I removed close to an inch from the top of the waistband. It does look better.
Of course, it would have been easier to start with a pattern that already had the features she wanted, but it really didn’t take that long to make the changes. Besides, it was fun; we really didn’t know where this project was heading. The goal was to end up with a skirt that she likes. We did that and now we have a basic pattern that will be used again. DD#1 wants a denim skirt…with that bird, no less…