Showing posts with label Accessories. Show all posts

Sunday, October 2, 2011

Tammy’s New Lunch Bag


It took all day for me to put my new lunch bag together yet not one bit of the construction was difficult. I started after breakfast and had expected to be done well before noon. Somehow cooking, laundry and other chores kept getting in the way.

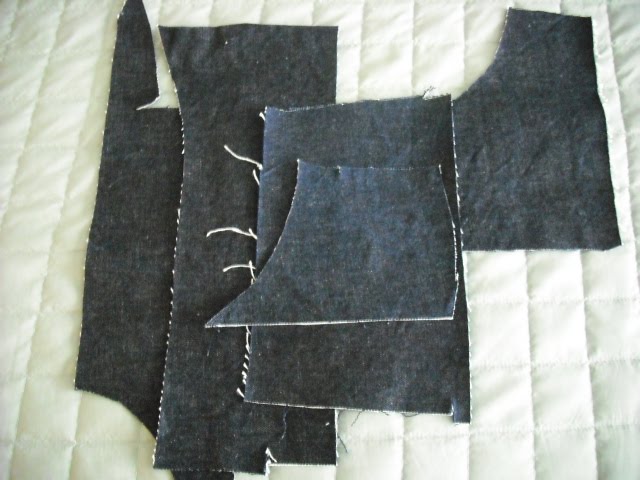
I found the pattern in a library book: Bag Boutique – Making Fabulous Purses & Totes written by Amy Barickman. This is the Donna Bag. There is only one pattern piece given; the rest are measurements. The shape looks very similar to the In-Style SuitcaseBag pattern by Indygo Junction.

Upholstery weight fabric (preferably an odd color and/or pattern) was my first choice. However, there wasn’t any on the shelf so I ended up choosing from the denim/pocket lining scraps basket. And this time, I think I really am at the end of the cat fabric as I had to piece the bottom gusset. For the interfacing, I was finally able to use up all of the small bits I’d been too frugal to pitch. I found some cotton batting and used that for interlining. I really hoped to use metal rings for the handles but I had only two that matched and needed four. Instead, I cut longer strips, securing them to the bag with topstitching and rivets. Another pattern change: a pocket added to the front.

The bag still needs a piece of plastic to lay in the bottom for support. Since I used things that were already here, it makes sense to avoid having to purchase the plastic. I’m thinking a plastic milk jug just might be the answer – even if it has to be pieced. I could make it a little slip cover and no one would be the wiser. Well, except us…


This is a good, simple bag. One could go a hundred ways with this pattern and they would all be right.


My bag could benefit from binding the interior seams (I serged them) and the use of a heftier interfacing (though this isn't bad). I’m fairly happy with how it turned out and I won’t have any qualms about tossing it into the washer and dryer.

The resized Burda blouse is next.

Monday, July 5, 2010

Canine Neckerchief Fashion

In the past few weeks, our cairn terrier has had infections in both ears.  He is on the mend but in taking him to the vet, DD#1 determined that his leash was worn and no longer suitable for use in public.  So, she bought him a new one.
Well, put a new leash in the mix and everything else looks sort of tired and shabby.  Before this new leash, the poor dog hadn't had anything new added to his wardrobe in a very long time.  DD#2, home for the Fourth of July weekend, decided an update was necessary.
She took matters into her own hands and sewed a new neckerchief for him using a cairn approved TNT pattern, McCall's 5016.  This pattern is now out of print.  The copyright date on the back of the envelope is 2005.
Our dog weighs about nineteen pounds and the medium size (10½” x 11”) fits him well.
Unlike standard canine neckerchiefs, this one doesn’t have tie ends.  Instead, the dog collar slips through the casing.  I like this method as you don't have to be concerned if it is tied too tightly or if it becomes too loose and catches on things.  Plus, it always looks tidy even if the dog doesn't!
DD#2 did a great job. I see more sewing in her future. Don’t you?

Monday, April 19, 2010

Little Bag

Last week, while visiting on the phone, DD#2 asked me to make her a little bag that would protect a name tag that she carries in her purse.
For inspiration, I used a bag that I had purchased years ago at the Container Store.  It holds the chargers and cords to my phone and camera when I travel.
To make this, two pieces of fabric and one piece of interfacing were cut, each eight inches by sixteen inches. Eight inches was chosen for the width as that was the length of the zipper that best matched the fabric.
Using a zipper foot, I sewed the zipper to the short ends of the fabric, forming a tube.  The side seams were sewn and the bottom corners boxed.  Black twill tape and beads were used for the zipper pull.
It took longer to take the photos that it did to sew the bag.  I couldn’t resist using the cat fabric for the lining. Yes, you will be seeing it again as there is a yard or two of it left.....

Wednesday, March 31, 2010

Denim Tote - Completed & the Return of the Bernina 930

The denim tote has been completed. DD#1 has claimed it. The tote is sturdy, but those pleats make it feminine and give it a bit of style - a wonderful use for the leftover denim. Here is what it looks like inside:
One of the rivets didn’t set right, so I removed it and tried again. I am not sure what tool should be used for rivet removal, but this is what I did:
First, I lifted the edges of the rivet up with a screwdriver and then I cut off the stem using this tool. It worked and if I need to remove any other rivets, this is the method I will use.

The Bernina is back.  I was able to speak to someone at the shop.  To keep it running well, I need to do the following about once a month:
  • Lower and raise the feed dogs (they get stuck if not used)
  • Run the basting stitch (yep – learned the hard way on that one)
  • Make buttonholes (again, it keeps things from getting stuck)
  • Use the embroidery stitches (specifically the honeycomb stitch as the needle has to go forward/backward and left to right to make the stitch)
Easy enough, I can do that……

Thursday, March 25, 2010

Denim Tote - Bernina 930 Defeated

While starting the final row of topstitching, the size 18 needle on the Bernina seized, but it did not break.  I unstuck it from the denim and examined it.  It had a rough spot near the point, so I replaced it with a fresh one and rethreaded the machine.  Everything appeared to be fine, except the needle would not go up or down.  I will call the Bernina shop today.....

The seam where those pins are is several layers thick.  I had started the topstitching on the side seam where even more layers are folded.  And, in case you are wondering, no, I did not hit a pin.

I use a lot of pins. I don't like to baste, unless I have to. I know that various tapes and glues are popular. For me, pins do the job.

The topstitching, besides being decorative on the outside, also fastens the bottom of the band lining to the tote.  Of course, I did not follow the pattern instructions.  The instructions have the tote lining sewn only at the upper edge, where the handles are.  The lining is otherwise loose inside the tote - making for a messy look, don't you think?

The tote wants rivets.  It shall have them.

Wednesday, March 24, 2010

Denim Tote - Everything But The Oink

This is what is left after cutting out the tote - evidence indeed of my project manangement skills.
And what fabric, kind reader, do you think was chosen for the lining?